Friday, February 13, 2015

Linear Sculpture Artwork for the Art Room!


As a continuation to the Bead Chandelier/Mobile project before the long winter break, the children were shown videos on Alexander Calder and his contribution to the Mobile/Stabile as well as working with wire, making a wire circus and introducing the world to Linear Sculpture, which is essentially a contour design (where you don't pick up your pencil) using wire.  However, since I am not Mr. Calder, Mrs. Slats came up with an activity to incorporate the students "found objects" into our own Linear Sculpture to help decorate the Art Room walls.  Due to all the end of the year activities and some field trips I was limited in my time with the students.  It turned out successfully, although I did have to adjust what the design was, based on the children available to me.  

My focus for this lesson was to teach the children how to work with wire (yes, even 1st grade) and twist wire around their object in such a way that it would not come loose.  It is no easy task I tell you.  Ironically enough, the fact that we were kind of "wrapping a present with ribbon" couldn't come at a better time as I told all the children, they may now help their parents with the holiday wrapping with their new technique!!  

I made the outline with sturdier wire and the children helped connect to each other to form the inside of each letter/character with thin pliable wire.  

This whole idea is based on Calder's Fish.  (This is where you keep an open mind and remember that I am not Mr. Calder :-)
Calder's Fish


Here is the end result hanging in the art room for their children to admire:

Don't you just love the "found objects" the children brought in! 


International Studies Block Printing Lesson

"Pulling a Print"
We have been busy-busy in the art room for the past couple of months.  After the long winter break, I began rolling out power points on the International Study Focus for each elementary grade level to apply to our Block Printing Project.  Each child was to design their own building/ship using design elements from their International Study per grade level.  We designed in our Art Journals, transferred the design to foam blocks using a relief technique and used brayers and special block printing ink to produce gorgeous prints.

Here is what our kids are learning in art:

1st:  Asian Architecture
2nd: Ancient Greek Architecture
3rd:  Viking Architecture
4th:  Middle Ages (Romanesque & Baroque Architecture)
5th:  European Explorer Ships

Our SECRET PASSWORDS for this study have included:  Block Printing, Architecture, International Focus, Pulling (a print), Texture, Editing

It has been fascinating for me not only to learn about these different architectural design elements, but to be able to teach them to the children has given me great pleasure.  Our school architecture is actually modeled after Greek Architecture we noticed as a class (2nd grade)  see evidence below.

As a class, we were able to determine they used Doric Columns (the most simple) for our building.  

I introduced a lot of new vocabulary in each of the grades.  The biggest reward was having the children make connections to the ideas I was teaching when they were visiting places, such as Epcot Center, which has information there about Viking Houses in Norway.  

All in all, this was a fantastic learning experience for me and the children to help tie in to the International Study Focus in the classrooms as well.  The children and I have also created classroom banners to proudly display our interpretation of each study with fabric pennants and our "best" block print.  Enjoy the photos.  More to come if I can remember to take my camera more often!


*************

1st Grade:  Focus:  Asian Architecture
Symmetry, Sweeping Roofs, Even # of Columns to solidify the symmetry.


***********

2nd Grade:  Focus:  Ancient Greek Architecture  
Temples, theaters & gymnasia.  Doric, Ionic and Corinthian Orders


***********

3rd Grade:  Focus:  Viking Architecture 
Turf Houses, Long Houses, Long Boats, Boathouses, Stave Churches

***********

4th Grade:  Focus:  Middle Ages (Romanesque & Baroque) Architecture
Gothic Arches, Flying Buttresses (Yes, I said it), Rose Windows, Gargoyles, Towers


***********

5th Grade:  Focus:  European Explorer Ships
Carracks, Caravels, Lateen Sails


Thursday, November 6, 2014

Happy Little Candy Still Life

On Friday, Oct. 31st I decided to take a break from our regularly scheduled programming to create a fun Candy Still Life with 3rd grade and up.  The Still Life concept was pretty new to many, but I gave them a choice of two candies and a teenie-tiny little eraser I found at Target.  The directions were to arrange the three items (preferably touching) and draw exactly what you see.  Here is just a small sampling of the work that was produced in this one-session art class.
6th grader


This is a 3rd grader!


Bead Mobile/ Chandelier Project

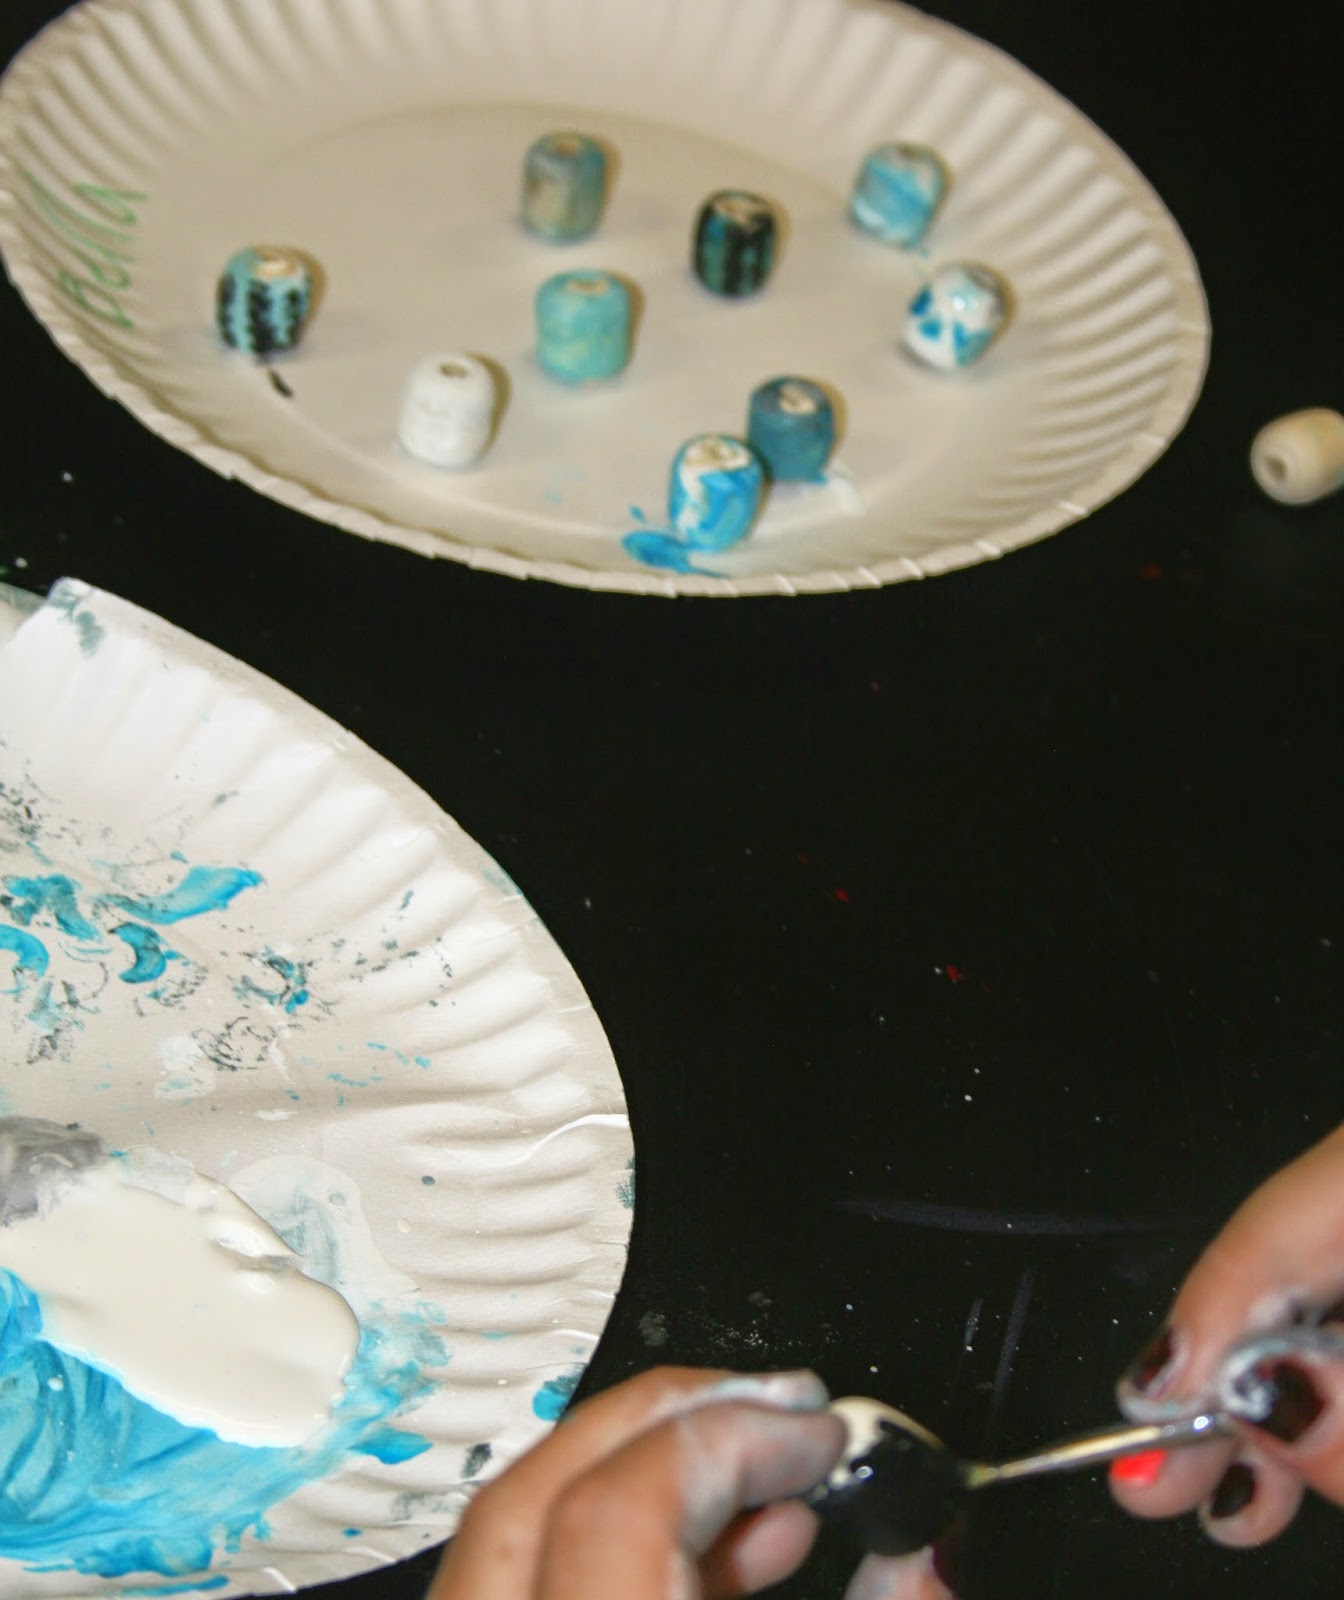
Wow, I have a lot to talk about today.  We are still focusing our efforts on color theory, but moving forward with a hands-on workable piece of art, The Chandelier!  I tasked the children to create a monochromatic color scheme with their beads.  A couple weeks ago, they were able to spin our lovely mounted color wheel in our art room to see which color they would be working with on this project.  They would then get only that color, plus white and black to create tints and shades.  The past several weeks I have been talking to my students about the materials they would be given for this project.  A stick, about ten beads, yarn, twine, pipe cleaners and wire (3rd grade & up). 

 Along the way I have come up with some pretty creative and relative secret passwords for classroom entry.
They include:
Innovative, Craftsmanship, Principles of Design and Assemble.  We talk about these words and how they relate to our project every week.  I am focusing on four Principles of Design which tie in nicely with this project.  Balance, Emphasis, Harmony and Variety.  We have been focusing mostly on the balance of our projects, probably because it's easily seen, even by my first graders.  This early exposure to these Principles will be very beneficial later on.

Last week, I had a special "tying" training session for most of my little artists.  Even the big kids benefited with practicing how to double-knot as well as UNtying those same knots.  I showed them a couple different ways to attach string and yarn to objects.  Hopefully some of these kids will even take on the task of taking out their own shoe knots because Mrs. Slats has challenged them to do it themselves, instead of handing the shoes over to mom or dad!  Parents-let me know if I'm successful!!   

I was very proud of all my students and how they created tints and shades on their very own artists palette (re: paper plate).  I tried to emphasize how we take a little bit of paint and mix our colors in separate places, rather than just mixing everything all together.  

I have one last thing to mention about our preparation to assemble these fine mobiles.  I had the kids choose their own stick (which was personally cut down in Mrs. Slats' back yard) and then I allowed them to sand off the rough spots if they wanted.  I had a table set up outside with different grits of sandpaper.  There was a lot of excitement to get in there and sand off a layer of the twig, or try to smooth it out a little.  I was surprised at how many of the kids are familiar with sanding, either helping their parents in the garage, or after school activities.  It's a wonderful feeling to get in there and really use great craftsmanship to build your own work of art!

Here are some visuals from our project so far. 


Examples of the color mixing on the palettes.  Notice the different tints and shades.


Examples of making a variety of values with their given color.  They were told to be innovative (thinking outside the box), so they used things other than paint brushes to apply color to the beads.  They also added designs within the tints and shades specifications.  

Innovation at it's finest...


This guy showed me how he remembered the different way I showed him to attach string & yarn to the sticks.  I was so proud!


They really enjoyed the sanding outside!


Monday, September 29, 2014

Color Theory Lessons and The Color Wheel

The past several weeks have been focused on color theory and all the colors in the color wheel.  The children were not allowed to use orange, green and purple colored pencils, or water colors, they needed to mix the colors themselves.  I would say that most of my kids would answer the question "If I run out of Red paint, what do I do?" properly.  Do you know it?  Well, you can't mix it, you must go to the store and buy it. 
 Although it was a hard task not to dip the paintbrush in orange and just get on with it, I feel like the kids really immersed themselves in color mixing.  On top of the primary, secondary and tertiary colors, I also had a heavy focus on tints and shades of each color.  Not sure you know 100% what that means?...ask your kid. :-)  
So I have this secret password thing to enter my art classroom.  The password is the same for all grades and changes each week.  I've been pretty tough on them, they had to remember (and try to pronounce correctly) the word monochromatic.  Ha Ha.  But even my 1st graders pulled it off.  And I would guess to say that MOST of them actually know what it means too!  We still have one more project where we will utilize a monochromatic scheme using our tints and shades, and make something wonderful.  But until then, please enjoy these colorful photos of the making of the color wheel with only THREE colors.  [Red, Yellow, Blue] AKA Primary Colors. Of course, they used white and black too, for making their tints and shades.
1st through 3rd Grade used Colored Pencils for their mixing.
They got to choose whether they did a tint or a shade for each color on the wheel in the smaller box below.

4th and 5th used Water Colors

These are my 1ST GRADERS!  Look at that saturation with the colors! 
 I told them I didn't want to see any white, just perfect!


Sunday, September 14, 2014

Art Portfolios and Art Journals


The past few weeks have gone by like a flash.  Seriously, the classes seem like they end as quickly as they begin.  I am enjoying every minute of it and really getting to know all the kids names, and unique personalities.  I think they think I'm funny, which is what I'm going for.  I should have been a kid comedian.  I love when I try to make something go over their heads, and there's one or two who catch it, and think I'm so funny.  That just tickles me.  Ok, on to art...

We finished up our Art Portfolios.  The children presented their uniqueness with sharpies, stencils, tapes of all fashions, along with stickers and a lot of imagination.  We will hold all our 2D works in them throughout the year.  


Self Portrait


Tearing and lining up duct tape to seal the sides of the Art Portfolio.


This is not misuse of duct tape.  Someone was trying to be funny.  It happens to be my child.  And in all honesty, the room got a lot quieter after this happened.

 *    *    *
We moved on to Art Journals for all of last week.  This is where the duct tape, scotch tape, fabric tape and washi tape really kicked in.  [Note to self-put tape on the supply list for NEXT year!]  I went shopping a lot for tape, I did a lot of begging for tape too.  Tape is fun.  The kids think it's fun too.  Just watching them try to cut it, tear it, share it and untwist it, mesmerized me, it really did.  There were lots of giggles and some serious down to business book creators.  We also had to figure out how to fashion an "art cash pocket" out of paper, tape or glue sticks.  Some of the creations that came my way really impressed me.  I said "wow" to myself a lot--in a good way.  I'm dealing with 200+ different brains thinking in different ways, someone is bound to wow me once in a while.  And that they did. 
Sometimes you need a buddy to help you position and rip the tape.

Lots of design choices

One pair of scissors for every kind of tape???  However the creativity flows--we just embrace it!

Someone likes art....and that makes me happy.


*    *    *
Our sixth and seventh graders really took the Art Journals to a higher level.  We introduced Coptic Binding/Stitching and had them hand stitch their journals together.  The end result was fantastic.  Here is one student making a signature (group of paper) that will be bound later by a Coptic Stitch.

Completed Coptic Stitch Journals


So you can see that the creativity is flowing in the LP art room.  I hope the children are excited to come each week.  Perhaps they've even mentioned who my "babies" are.  There are eighteen of them in the classroom, that need to be looked after with great care.  I talk a lot about my "babies" and how special they are to me.  

Next up--Color Theory.  This is where the real fun begins!!  Stay Tuned...